Making strawberry jam at home lets you enjoy the taste of summer all year long. This guide walks you through every step of canning strawberry jam safely and successfully.
What You Need to Make Strawberry Jam
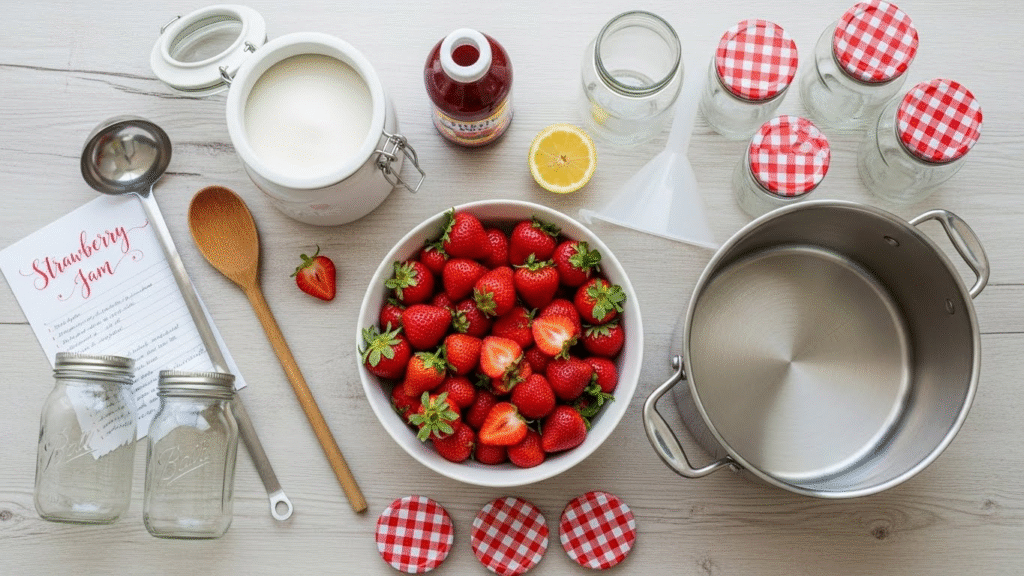
Basic Ingredients
Fresh Strawberries: You need 8 cups of whole strawberries (about 2.5 to 3 pounds). Almost overripe berries work best because they mash easily and cost less. Many farm stands sell “jam berries” at a discount.
Sugar: Plan for 4 to 7 cups depending on your recipe. Sugar helps preserve the jam and helps it set. Don’t reduce the amount unless you use a low-sugar recipe.
Pectin: Use powdered pectin if your recipe calls for it. Strawberries are low in pectin, so most recipes need added pectin to thicken properly.
Lemon Juice: Add 2 tablespoons of bottled lemon juice. Fresh lemon juice has varying acidity levels, but bottled juice stays consistent for safe canning.
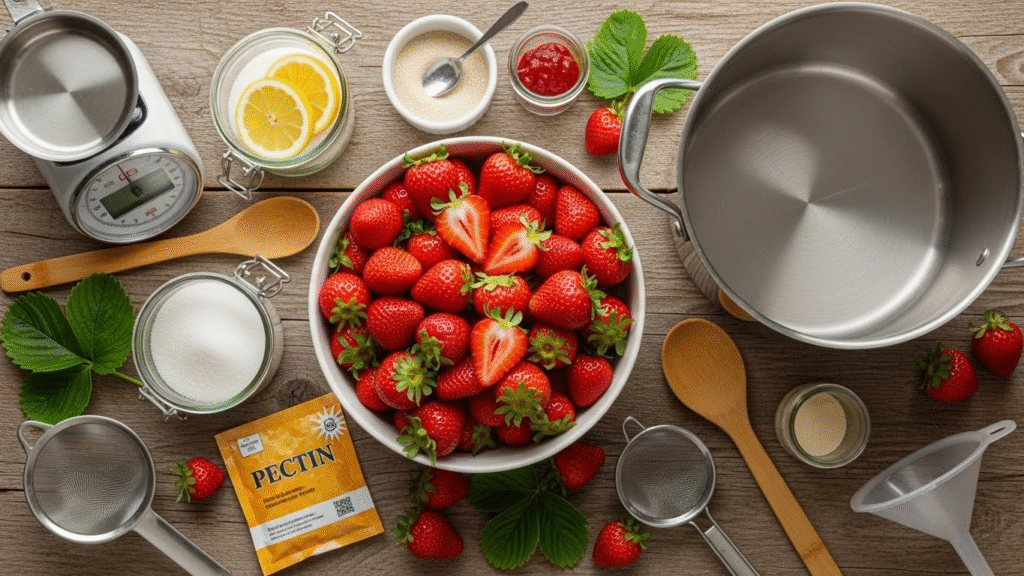
Equipment You’ll Need
Large Pot: Get an 8-quart or larger pot with a heavy bottom. The jam will triple in size when it boils, so make sure you have enough space.
Water Bath Canner: You need a canner tall enough to cover jars with at least 1 inch of water. Any large stock pot works if it’s deep enough.
Canning Jars: Use half-pint or pint-sized mason jars with new lids and metal bands.
Jar Lifter: This tool safely lifts hot jars in and out of boiling water.
Canning Funnel: A funnel helps fill jars without spills.
Nonmetallic Spatula: Use plastic or silicone tools to prevent jar breakage.
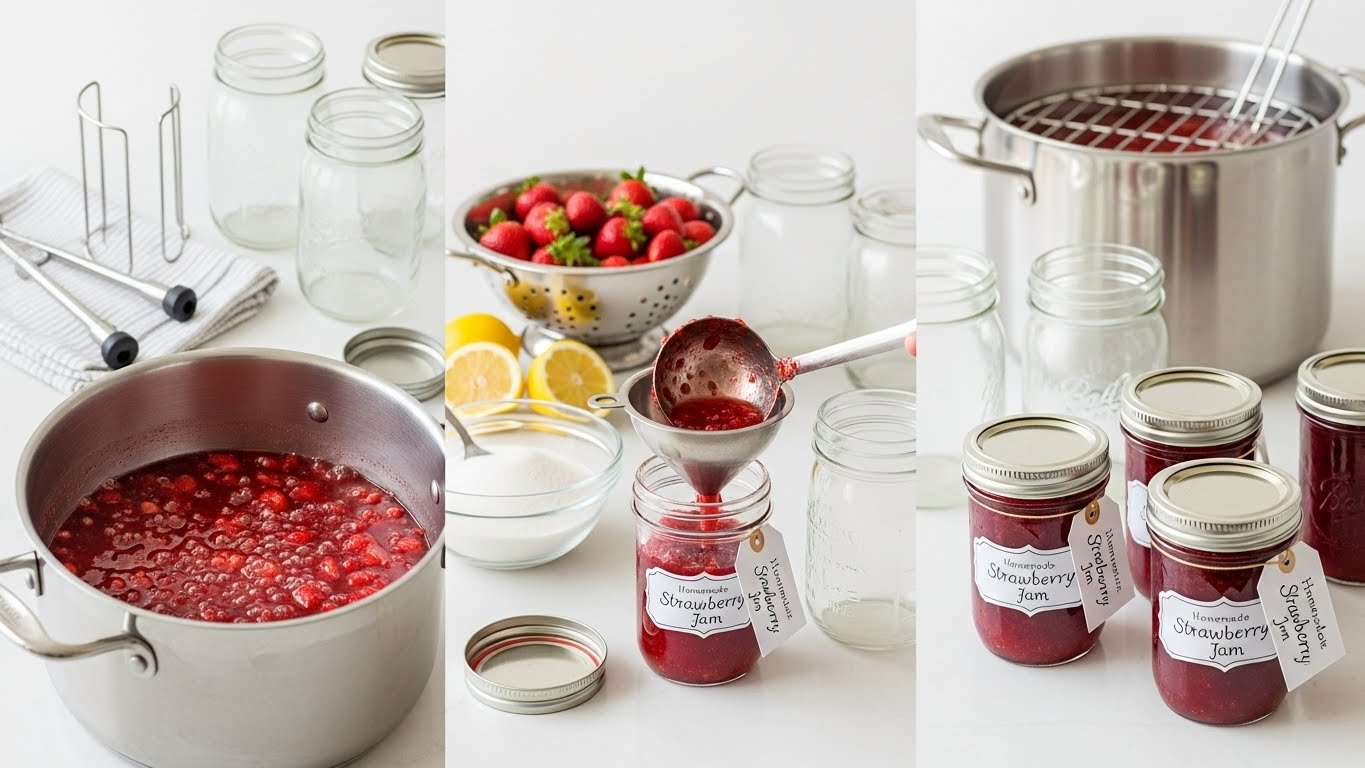
Step-by-Step Canning Instructions
Prepare Your Equipment First
Start by setting up your canning station before cooking the jam. The cooking happens quickly, but heating water takes time.
- Wash all jars in hot soapy water
- Place jars in the canner and cover with water
- Bring water to a simmer and keep jars hot
- Add 1 tablespoon white vinegar to prevent cloudy jars
- Wash lids and bands in hot soapy water and set aside
Prepare the Strawberries
- Rinse strawberries gently. Don’t soak them.
- Remove stems and hulls
- Cut berries into small pieces or crush them
- Measure 5 cups of crushed strawberries after mashing
Pro Tip: Smaller pieces make smoother jam. Use a potato masher or blend briefly for your preferred texture.
Cook the Jam
- Pour crushed strawberries into your large pot
- Add pectin and lemon juice
- Stir constantly over high heat
- Bring to a full rolling boil that you can’t stir down
- Add all the sugar at once
- Return to a full boil and cook for exactly 1 minute
- Remove from heat and skim off any foam
Important: Don’t walk away during cooking. Jam burns easily and needs constant stirring.
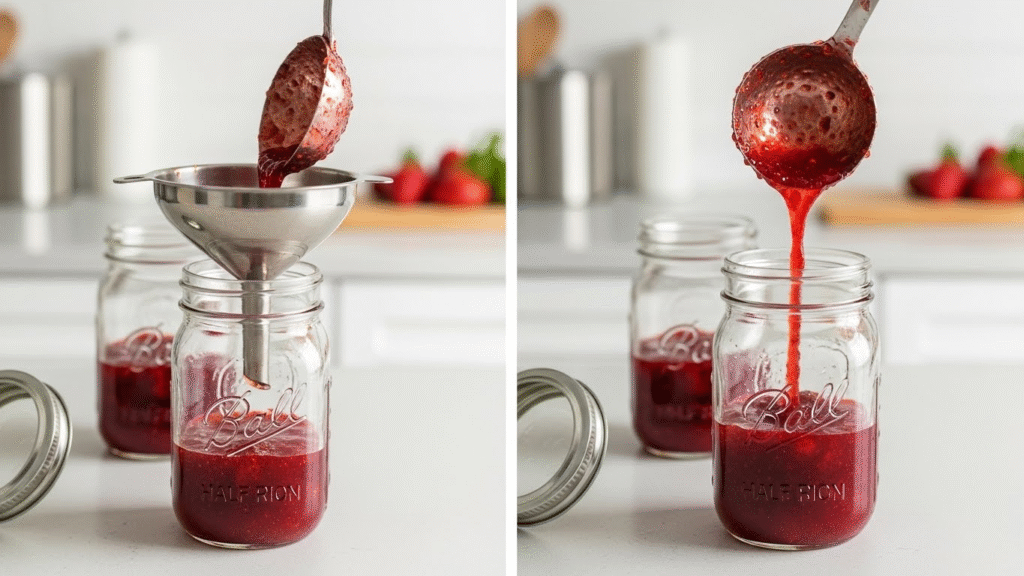
Fill and Seal Jars
- Remove one hot jar at a time from the canner
- Use the funnel to ladle hot jam into the jar
- Leave 1/4 inch of space at the top (headspace)
- Wipe the rim clean with a damp paper towel
- Center the lid on the jar
- Screw the band on fingertip tight
- Place jar back in the canner
Fingertip Tight Means: Tighten until you feel resistance, but don’t use your whole hand to force it tighter.
Process in Water Bath
- Make sure water covers jars by at least 1 inch
- Bring water to a rolling boil
- Process for 10 minutes (adjust for altitude)
- Turn off heat and let jars sit for 5 minutes
- Remove jars and place on a towel
- Let cool for 12 to 24 hours undisturbed
Altitude Adjustments for Canning
Water boils at lower temperatures at high altitudes. Add these processing times:
- 1,000 to 3,000 feet: Add 5 minutes
- 3,001 to 6,000 feet: Add 10 minutes
- Above 6,000 feet: Add 15 minutes
How to Check for Proper Seals
After jars cool completely, press the center of each lid. A properly sealed jar won’t flex or make a popping sound. Store any unsealed jars in the refrigerator and use within 3 weeks.
Common Problems and Solutions
Runny Jam
Your jam might stay runny for several reasons:
Not Enough Cooking: The mixture needs to reach 220°F at sea level. Use a thermometer to check.
Too Much Fruit: Don’t make batches with more than 6 cups of crushed fruit. Larger batches can’t reach the right temperature.
Old Pectin: Check the expiration date. Store pectin in a cool, dry place in an airtight container.
Wait Longer: Some jams take up to 3 days to set completely. Be patient before remaking.
How to Fix Runny Jam
- Empty jars back into a large pot
- Add 1 tablespoon powdered pectin per cup of jam
- Bring to a rolling boil for 1 minute
- Test for thickness on a cold spoon
- Rewash and sterilize jars
- Fill and process again for 10 minutes
Floating Fruit
Strawberries float to the top because they’re lighter than the syrup. This is safe to eat. To prevent floating:
- Use very ripe berries
- Crush fruit into smaller pieces
- Let jam cool for 5 minutes before filling jars
Foam on Top
Add 1/2 teaspoon of butter before adding sugar. This reduces foam buildup during cooking.
Dark Surface
Too much headspace causes the top layer to darken. Scoop off the dark layer and eat the rest. Always leave exactly 1/4 inch of headspace.
Recipe Variations to Try
Low-Sugar Strawberry Jam
Use no-sugar-needed pectin and add only 1 to 2 cups of sugar based on taste. Follow the pectin package directions for cooking times.
Vanilla Strawberry Jam
Add one split vanilla bean to the crushed berries. Remove it before filling jars for a sundae-like flavor.
Balsamic Strawberry Jam
Replace 2 tablespoons of lemon juice with 3 tablespoons of good-quality balsamic vinegar for a richer taste.
Storage and Shelf Life
Properly canned strawberry jam lasts 12 to 18 months in a cool, dark place. Keep jars away from direct sunlight and heat sources.
After opening, store jam in the refrigerator for up to 3 months.
Freezer Storage Option
You can skip water bath canning and freeze jam instead:
- Let cooked jam cool completely
- Fill jars leaving 1 inch of headspace
- Use wide-mouth jars to prevent breakage
- Freeze for up to 1 year
Safety Tips for Canning
Always Use New Lids: Old lids may not seal properly. Reuse bands but never reuse lids.
Don’t Double Recipes: Make two separate batches instead. Large batches won’t reach the correct temperature.
Use Bottled Lemon Juice: Fresh lemon acidity varies too much for safe canning.
Never Skip Water Bath Processing: Raw packing jam creates perfect conditions for mold growth.
Check for Jar Damage: Inspect jars for cracks or chips on the rim. Damaged jars won’t seal.
Why Strawberry Jam is Safe for Water Bath Canning
Strawberries have high natural acidity and high sugar content. This combination prevents harmful bacteria from growing. Water bath canning works perfectly for jam because of this acidity.
Never use a pressure canner for jam. The high heat breaks down the gel and makes jam runny.
Using Fresh vs Frozen Strawberries
Both work equally well. For frozen berries:
- Thaw completely and save all the juice
- Chop into small pieces
- Include all liquid when measuring
You can also freeze berries throughout the season. When your bag is full, make a big batch of jam.
Choosing the Right Jar Size
Half-Pint Jars: Perfect for gifts and smaller households. Process for 10 minutes.
Pint Jars: Good for families who use jam regularly. Process for 10 minutes.
Avoid Quart Jars: Large jars don’t work well for jam because they cool slowly and may not process safely.
Best Practices for Beginners
Test Your Recipe First: Make a small batch before committing to large quantities.
Keep Everything Clean: Wash hands, tools, and surfaces before starting.
Fill Jars One at a Time: This keeps jars hot and prevents temperature shock.
Label Your Jars: Write the date and contents on each jar.
Save One Jar for Testing: Keep one jar in the refrigerator to check texture before storing the rest.
Troubleshooting Temperature Issues
Too Little Heat: Jam won’t reach the gelling point. Use high heat and a large burner.
Too Much Heat: Jam burns on the bottom. Stir constantly and don’t leave the stove.
Uneven Heating: Heavy-bottomed pots distribute heat better than thin pots. Consider using enameled cast iron.
What to Do with Runny Jam
Even if your jam doesn’t set, you can still use it:
- Pour over ice cream or yogurt
- Mix into smoothies
- Use as pancake or waffle syrup
- Stir into oatmeal
- Spread on pound cake
Tips for Better Jam Texture
For Chunky Jam: Mash berries with a potato masher and leave some larger pieces.
For Smooth Jam: Blend berries briefly or chop very small.
For Seedless Jam: Push cooked berries through a fine-mesh strainer before adding sugar.
Final Thoughts
Making strawberry jam at home takes practice, but the results are worth the effort. Your first batch might not be perfect, but each attempt teaches you something new.
Start with small batches until you understand the process. Use a tested recipe and follow all safety guidelines. Most importantly, enjoy the process and share your homemade jam with family and friends.
The taste of homemade strawberry jam beats store-bought versions every time. Once you master this recipe, you’ll want to make jam every strawberry season.
Internal Links to Add:
- Link “recipe” in paragraph 1 to: https://flavrpins.com/category/recipes/
- Link “fresh” in “Fresh Strawberries” section to: https://flavrpins.com/9-intriguing-histories-of-everyday-meals/
- Link “step” in “Step-by-Step” heading to: https://flavrpins.com/7-traditional-recipes-that-tell-cultural-stories/
- Link “home” in final paragraph to: https://flavrpins.com/10-vegetable-soup-recipes/
External Link Suggestion: Add this authoritative external link: “For more detailed USDA canning guidelines, visit the National Center for Home Food Preservation for tested recipes and safety information.” (Insert after the Safety Tips section)